When it comes to servicing and fine-tuning your furnace, this job should be left to professionals. Here are the steps that might be included in a typical furnace tune-up.
Furnace Servicing


Furnace Inspection


Step 1: Conduct a Visual Inspection
After turning off the power and fuel supply, the specialist conducts a visual inspection of the venting system (Image 1), which is designed to remove flue gases. Venting ducts are checked to make sure they are in good condition and well sealed, and joints are checked. Each joint should be sealed using at least three metal screws.


Step 2: Remove the Covers and Check the Filter
The filter is removed (Image 2) and checked to see whether it needs replacing. The filter shown in our demonstration was an older style filter.
Typical filters slip into a slot in the air-handling portion of the furnace. They are marked with an air-flow indicator (Image 3). It’s important that the filter is installed so that it is oriented properly, with the arrow pointing in the direction toward the furnace.


Step 3: Check the Blower


Step 4: Remove and Clean the Burners
The burners are cleaned (Image 2) using fresh water to remove any dust and debris. This will ensure safer and more efficient burning.
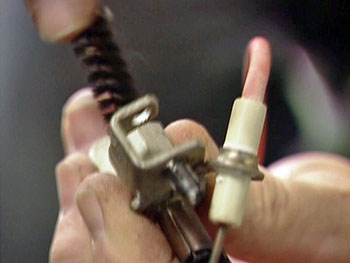
The sensor and pilot is cleaned (Image 3) with a wire brush and an emery cloth. This will help ensure that these devices operate effectively.


Step 5: Reassemble the Components


Step 6: Perform Safety Tests
Safety Tips
- It’s highly recommended that you invest in a carbon monoxide alarm (Image 3) for the inside of your home. This will alert you if potentially dangerous carbon monoxide gas levels get too high in your living space.
- Keep the area around the furnace clean and unobstructed for safety and accessibility.


